Platformer
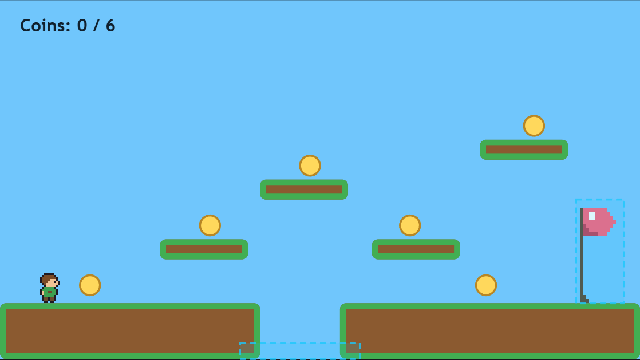
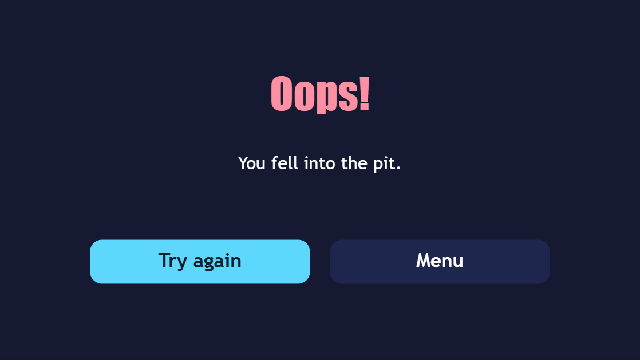
Run and jump across the platforms, grab the six coins, and reach the flag. Fall into the pit and it's Oops!, with a button to try again.
Almost everything here comes from components, the ready-made cards in Properties:
- The hero gets a Character controller.
- The ground and platforms are Static bodies.
- The coins are Pickups.
- The flag and the pit are Trigger zones.
A state graph picks the hero's animation: standing, running or jumping, facing left or right. The only code is the small scripts the components write for you, and you'll change a couple of lines in two of them.
What you'll learn
- Giving controls behaviour with components, and tuning them.
- Reading and changing the script a component writes.
- Making a sprite's animations with clips, and letting a state graph switch between them.
- Using trigger zones to open another screen when the player reaches them.
- Showing a score that counts itself, with
${score}.
Glossary
| Word | What it means |
|---|---|
| Component | A card in Properties that adds behaviour to a control, like a Character controller or a Pickup. Some write a small script for you. |
| Physics body | A control the physics engine handles. Dynamic bodies fall and bump into things. Static bodies never move, so everything stands on them. |
| Gravity | How strongly dynamic bodies fall, set per screen (900 here). |
| Trigger | A body that things pass through. It fires trigger_enter when something enters it. |
| Sprite | A control that plays frames from a picture sheet. |
| Clip | A named run of a sprite's frames, like run_right. |
| State graph | A list of states (each plays a clip) and the ways out of each state (when to switch). It runs by itself. |
input:right | In a state graph, true while the right input is held. !input:right means it isn't held. |
Rebuild it from scratch
1. Project and screens
- File → New project, named
Platformerwith the Idplatformer. In **Project → Project settings…, set Made for to Web & desktop only**. - Make four screens, all 320 × 180:
title(tick Main screen)levelwingameover
- Build
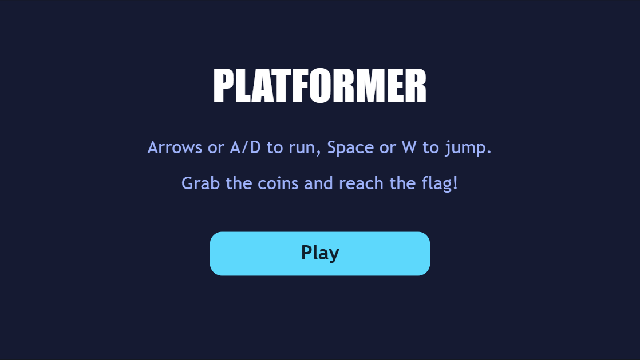
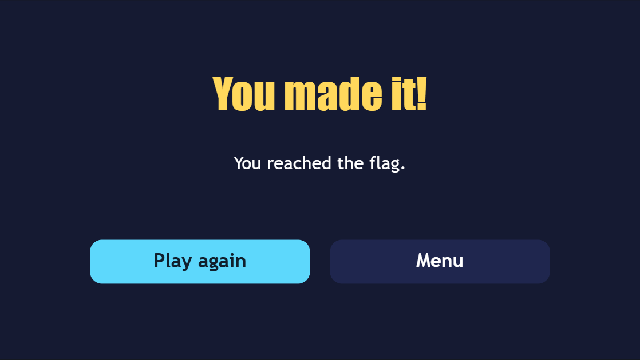
title,winandgameoverlike the Beginner templates: a background, labels, and buttons whoseclickactions areplay_soundandopen_ui. Play, Play again and Try again openlevel, and Menu openstitle.
| Title | You made it! | Oops! |
|---|---|---|
 |  |  |
2. The level screen
- Select
leveland click Screen settings. - Set Gravity to 900 and Tick interval (ms) to 16. The game checks the controls every 16 ms.
- Add two variables:
score=0;air=no.
Add a light-blue Panel as the sky, filling the screen.
3. Ground and platforms
- Add Panels for the ground and platforms. Brown fill, a green Border 3 px wide, and **Corners → Radius** 3. The template uses:
ground_left: 0, 152, 130 × 28ground_right: 170, 152, 150 × 28. The gap between them is the pit.platform1toplatform4: four 44 × 10 platforms at different heights.
- For each one, open Properties → Advanced · web & desktop, click + Add component, and choose Static body. Now it's solid.
4. The hero
- Draw the hero in the Pixel editor as four 16 × 16 frames, all side views: facing left, left stepping, facing right, right stepping.
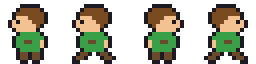
- Add a Sprite called
heroon the left of the ground. - Open the Sprite sheet editor (double-click the sprite), set the frame size to 16 × 16, and make six clips:
| Clip | Frames | Speed |
|---|---|---|
idle_left | 0 | 1 |
run_left | 0, 1 | 8 |
jump_left | 1 | 1 |
idle_right | 2 | 1 |
run_right | 2, 3 | 8 |
jump_right | 3 | 1 |
- With the hero selected, + Add component → Character controller. That does three things:
- It makes the hero a dynamic body.
- It adds the inputs
left,rightandjump(arrows, A/D, Space/W/Up). - It writes
scripts/client/hero_controller.js, which runs every tick.
Its card shows three numbers to tune: SPEED, JUMP and GROUND_GRIP.
5. Two small changes to the hero's script
Click Open script on the Character controller card. Two changes:
a) Coins shouldn't count as ground. The controller decides you're on the ground if you're touching anything, and that includes a coin or the flag. Change the ground check so triggers don't count:
var solid = ctx.physics.touching('hero').filter(function (id) { return !/^(coin|goal|pit)/.test(id); });
var onGround = solid.length > 0 && Math.abs(me.vy) < 40;
b) Tell the animations when you're in the air, and play a jump sound. Add the sound where the jump happens, and one line before the last line of the function:
if (onGround && ctx.input.isDown('jump')) {
    vy = -JUMP;
    ctx.client.playSound('platformer:jump');
}

ctx.state.set('air', onGround ? 'no' : 'yes');
Keep the var SPEED = … lines at the top exactly as they are. That's what the card reads.
6. The state graph
Open Advanced → State graphs… and click + New graph. Give it the ID hero_moves and choose the Sprite hero. Add six states with + State, each playing the clip with the same name. Then add the ways out of each one with + Way out of:
| State | → goes to | when | priority |
|---|---|---|---|
idle_right | jump_right | air == 'yes' | 3 |
run_left | input:left | 2 | |
run_right | input:right | 1 | |
run_right | jump_right | air == 'yes' | 3 |
run_left | input:left | 2 | |
idle_right | !input:right | 1 | |
jump_right | jump_left | input:left | 2 |
idle_right | air == 'no' | 1 |
Then the same three states again for the left side, with left and right swapped. Set Starts in to idle_right and click Apply.
7. Coins
- Add six small yellow circles: from Shapes, an ellipse, 10 × 10. Call them
coin1tocoin6. - Give each one + Add component → Pickup. It becomes a trigger. Its
trigger_enterevent runs a script,scripts/client/coin1_pickup.js, that hides the coin and addsWORTHtoscore. - Open each pickup script and delete the
ctx.message(…)line. It's there to help while you build, and would pop up a message in the game. - In each coin's Events → trigger_enter, also add the action
play_soundwith a coin sound. An event can run a script and actions.
Add a Label at the top: Coins: ${score} / 6.
8. The flag and the pit
- Draw a flag and add it as an Image. Over it, add a Box collider (from **▸ Advanced · web & desktop in the Toolbox) called
goal. Give it + Add component → Trigger zone**, and on itstrigger_enteradd the actionopen_uiwith the valuewin. - Add another Box collider,
pit, across the gap at the bottom. Make it a Trigger zone too, and on itstrigger_enteraddopen_uiwith the valuegameover.
9. Play
Press Preview (F5). Run with the arrows, jump with Space, and watch the hero turn and switch between standing, running and jumping.
How it works
- Components write ordinary scripts. The Character controller is 15 lines of script you can read and change. So is each Pickup. Nothing is hidden.
- The screen's tick runs the controller. Every 16 ms,
tickreads the inputs, works out the hero's speed, and hands it to the physics engine. The engine does the falling and the standing on platforms. A screen'stickruns one script, so keep one controller per screen. - The state graph only looks, it never moves anything. Each frame it checks the ways out of the current state, highest priority first, and switches when one is true.
aircomes from the controller, andinput:leftstraight from the keyboard. - Triggers open screens without code.
trigger_enteris an event likeclick, so it can have actions, includingopen_ui. - Every visit starts fresh. Try again opens
levelagain. The coins are back andscoreis 0, because a screen starts as designed each time it opens.
Make it yours
- Tune the feel: raise
JUMPfor floatier jumps, and lowerGROUND_GRIPfor slidier stops. - Make a second level: copy the
levelscreen, move the platforms, and point the first level's flag atlevel2instead ofwin. - Add spikes: a Trigger zone with
open_uigameover, drawn with a spiky Image. - Add a moving platform: an Animation that moves a platform's
xback and forth, with Loop and Autoplay ticked. Give the platform a Kinematic body instead of a Static body.