Top-down explorer
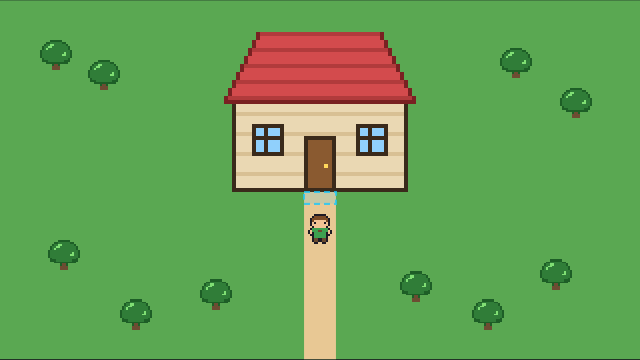
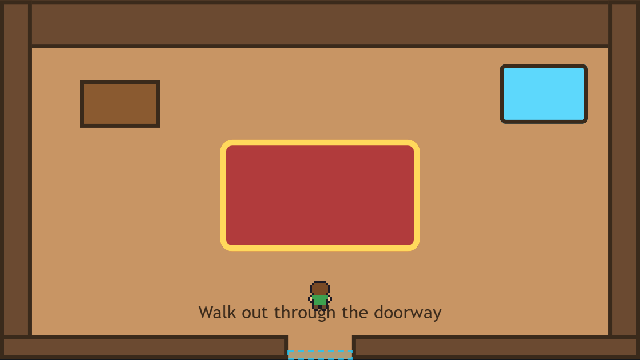
A little top-down world. Walk around outside, then step up to the front door and you're inside the house. Walk out through the doorway at the bottom and you're back outside.
The best part is the hero: it faces the way it walks and plays a walking animation for each direction, then stands still facing the same way when you stop. That's all done by a state graph, with no animation code at all.
What you'll learn
- Making an 8-clip sprite: walking and standing, for each of four directions.
- Building a state graph that chooses the right clip from the keys being held.
- Moving a character with the Top-down mover component.
- Making scenery solid with Static body, and keeping the player on screen with invisible walls.
- Joining two screens with doors: trigger zones whose
trigger_enteropens the other screen.
Glossary
| Word | What it means |
|---|---|
| Sprite | A control that plays frames from a picture sheet. |
| Clip | A named run of a sprite's frames, like walk_left (frames 4 and 5). |
| State graph | A list of states, each playing a clip, and the ways out of each state: the conditions for switching. It runs on its own, every frame. |
| Priority | When more than one way out is true, the highest priority wins. |
input:up | In a condition, true while the up input is held. !input:up means it isn't. && means "and". |
| Top-down mover | A component that moves a control with the four direction inputs, in eight directions. |
| Static body | A component that makes a control solid: it never moves, and nothing walks through it. |
| Trigger zone | A component for an invisible area that fires trigger_enter when something walks into it. |
Rebuild it from scratch
1. Project and screens
- File → New project, named
Top-down explorerwith the Idexplorer. In **Project → Project settings…, set Made for to Web & desktop only**. - Make three screens, all 320 × 180:
title(tick Main screen),outsideandhouse. - On
title, add a Play button whoseclickhas the actionsplay_soundandopen_uioutside. - On
outsideandhouse, open Screen settings and set Tick interval (ms) to 16 and Gravity to 0. From above, nothing falls.
2. The hero's frames and clips
- Draw the hero in the Pixel editor as eight 16 × 16 frames: down, down stepping, up, up stepping, left, left stepping, right, right stepping. The right frames are the left ones flipped.

- Add a Sprite called
heroto theoutsidescreen, just below the house door. - In the Sprite sheet editor, make eight clips:
| Clip | Frames | Speed |
|---|---|---|
idle_down | 0 | 1 |
walk_down | 0, 1 | 6 |
idle_up | 2 | 1 |
walk_up | 2, 3 | 6 |
idle_left | 4 | 1 |
walk_left | 4, 5 | 6 |
idle_right | 6 | 1 |
walk_right | 6, 7 | 6 |
3. Walking
- Select the hero and + Add component → Top-down mover. It adds the inputs
up,down,leftandright: arrows, WASD, the d-pad, and a drag on a touch screen. It also writesscripts/client/hero_mover.js, which sets the hero's speed from those inputs every tick. TuneSPEEDon its card. - On the hero's Rigidbody card, choose Dynamic. A dynamic body is stopped by walls, and with the screen's gravity at 0 it doesn't fall.
4. The state graph
This is the heart of the template. Open Advanced → State graphs…, click + New graph, give it the ID hero_walk, and choose the Sprite hero. Add eight states with + State, one per clip, each playing the clip with its own name.
Every idle state has four ways out. Holding any direction starts walking that way:
From idle_down (and the same for every idle state) | when | priority |
|---|---|---|
→ walk_down | input:down | 1 |
→ walk_up | input:up | 1 |
→ walk_left | input:left | 1 |
→ walk_right | input:right | 1 |
Every walk state has four ways out too. Here's walk_left:
From walk_left | when | priority |
|---|---|---|
→ walk_down | input:down && !input:left | 2 |
→ walk_up | input:up && !input:left | 2 |
→ walk_right | input:right && !input:left | 2 |
→ idle_left | !input:left | 1 |
The other walk states follow the same pattern: swap left for their own direction. Set Starts in to idle_down and click Apply.
Why
&& !input:left? Without it, holding Left and Up together would flip betweenwalk_leftandwalk_upevery frame. With it, the hero keeps facing the first direction you pressed until you let go of it. The priorities make sure turning (2) is checked before stopping (1).
5. Outside
- Add a green Panel as grass, and a sandy Panel as a path up to the house.
- Draw a house (48 × 40 in the Pixel editor) and add it as an Image, drawn at double size (96 × 80). Give it + Add component → Static body.
- Add some trees as Images, each with a Static body.
- Add four Box colliders (from ▸ Advanced · web & desktop in the Toolbox) just outside the screen's edges, each a Static body. They're invisible walls that keep the hero on screen.
6. The doors
- Outside: add a small Box collider called
doorright in front of the house's door (16 × 6), and give it + Add component → Trigger zone. In its Events, ontrigger_enter, add the actionsplay_sound(a door sound) andopen_uiwith the valuehouse. - Inside: build the
housescreen from Panels: a wooden floor, walls with Static body, a rug, a table and a bed. Leave a gap in the bottom wall. Put a Box collider calledexitin the gap, as a Trigger zone, withtrigger_enter→play_soundandopen_uioutside. - Copy the hero onto the
housescreen, just above the doorway. Its components and clips come with it. Add the same state graph there too.
7. Play
Press Preview (F5), walk around, and watch the hero turn. Walk into the door, look around the house, and walk back out.
How it works
- Three jobs, three tools. The Top-down mover moves the hero. The state graph picks its animation. The physics engine stops it at walls. None of them knows about the others: the graph only watches the keys, and never the speed.
- The graph remembers the direction. Stopping goes to the idle state *of the direction you were walking*, so the hero keeps facing that way. That memory is simply which state you're in.
- Doors are just events.
trigger_enteris likeclick: it can have actions.open_uiswitches screens, so a door needs no code. - Each screen starts fresh. When you come back outside, the hero starts where you placed it on that screen: right by the door, which is exactly where you'd walk out.
Make it yours
- Add more rooms: one more screen, one more door trigger, one more
open_ui. - Put a Pickup on some coins, like in Platformer, and show them with
Coins: ${score}. - Add a friendly character: a sprite with the Follower component that walks after the hero (set its
TARGET_TAGto a tag you give the hero). - Ready for something bigger? The Adventure template builds a whole world of rooms on one screen, with a scrolling camera.